
A clear carton window usually looks cloudy, wavy, scratched, or starts lifting because the window was treated as a decorative add-on instead of a converting system. The opening shape, film grade, adhesive, printed board surface, insert, product clearance, packing method, and distribution conditions all affect the result. A buyer can reduce many avoidable failures by specifying the viewing requirement and approving a filled, production-intent carton rather than approving an empty visual mock-up alone.
This guide explains how to diagnose the defect, what to put in an RFQ, and what evidence to request before mass production. It does not prescribe one universal film thickness, glue pattern, or process setting: those decisions must be confirmed against the actual carton, film, coating, equipment, product, and route to market.

Start with the symptom, not the word “window”
“The window is bad” is too vague for corrective action. Photograph the issue under the same lighting used for approval, mark its position on the dieline, and record whether it appeared before filling, after packing, or after transport. The pattern often narrows the investigation.
| What you see | Likely areas to investigate | Useful approval evidence |
|---|---|---|
| Uniform haze | Film grade, surface finish, protective liner, residue, or the wrong side facing outward | Film identification plus an approved clarity sample under agreed lighting |
| Random scratches or rub marks | Blank stacking, abrasive contact, dust, packing friction, or removal of protection too early | Packed samples after normal handling and a transport simulation appropriate to the shipment |
| Waves or oil-canning | Film tension, curl, heat history, an oversized unsupported span, or board distortion | Assembled cartons conditioned and filled with the real product or a weight-and-shape equivalent |
| One edge lifts | Insufficient overlap, interrupted adhesive, contaminated bond area, or incompatible coated surfaces | Peel inspection around the complete patch perimeter after the agreed conditioning period |
| Glue squeeze-out | Excess deposit, poor glue-path control, or too little clearance between adhesive and the visible opening | Back-side inspection of production-speed blanks, not only hand-made samples |
| Crack or white stress mark near a corner | Sharp opening geometry, folding stress, product interference, or a patch crossing a crease | Repeated opening, filling, and closing checks on a die-cut sample |
A single carton can show more than one mechanism. For example, a wavy patch may also rub against the product, creating scratches later. Separating appearance, adhesion, and structural symptoms prevents the supplier from “fixing” clarity while leaving the bond or carton geometry unchanged.
Treat the window as six connected specifications
1. Define what the customer must see
State whether the window needs to show the whole product, a fill level, a color, a texture, or only product presence. A larger opening is not automatically better. It removes paperboard from the panel, increases the unsupported film area, and can expose inserts or warning panels that should remain hidden.
For a disposable vape box with a PET or PVC display window, the brief should identify the exact portion of the device that must remain visible after the insert is loaded. That lets the structural designer coordinate the window and insert instead of centering the opening on an empty carton.
2. Specify the film rather than writing “clear plastic”
Polymer name alone does not define optical or bonding performance. Film suppliers offer different surface treatments, haze levels, friction behavior, dimensional stability, and adhesion-promoting surfaces. Toray, for example, describes a transparent PET packaging film whose surfaces are modified to improve printing and laminating adhesion. That is useful evidence that surface condition matters; it is not a recommendation for a particular PaperBoxPro order.
Your specification should identify the agreed film family, thickness, clarity target, surface orientation, color or tint, and any product-contact or market requirement that genuinely applies. If the window is expected to resist rubbing, ask how that expectation will be tested. Do not convert a supplier’s property sheet into a finished-pack guarantee without a trial on the actual carton.
3. Design a bond area, not just a visible aperture
The patch must extend beyond the cut opening far enough to create a continuous bond land, while staying clear of scores, locking features, and areas that will be heavily flexed. The required overlap is a manufacturing decision, not a decorative line in the artwork.
Henkel notes that substrate type, recycled-fiber content, coatings, production speed, machine setup, storage, and environmental factors can influence paper-packaging performance. Its paper-converting portfolio also distinguishes adhesives intended for window patching across different film materials. The practical procurement lesson is simple: approve the board, coating, film, adhesive, and application route as one combination.
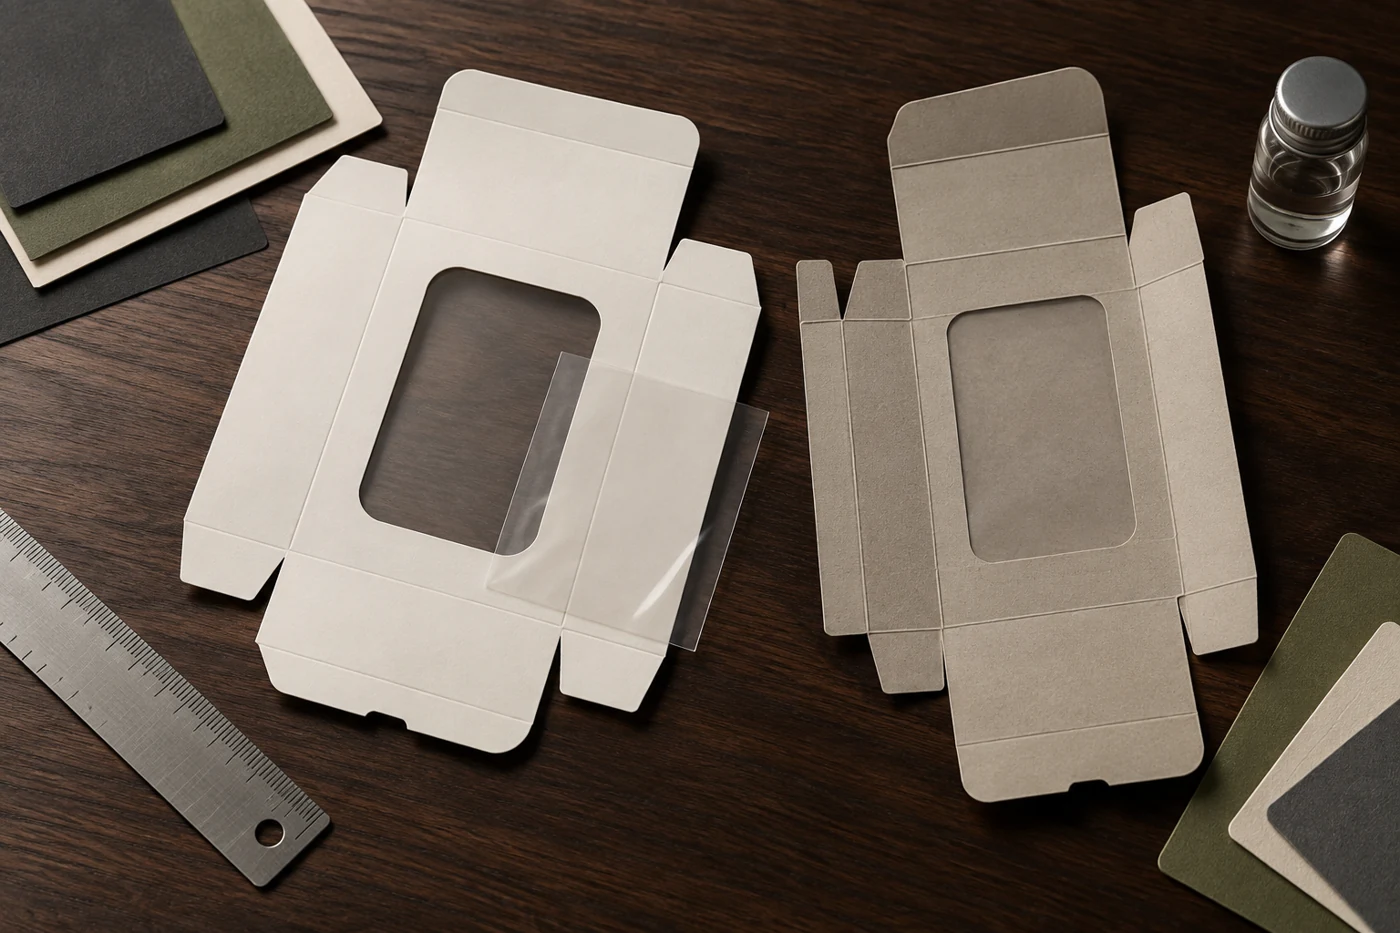
Keep the adhesive land free from unnecessary varnish, foil, heavy ink, powder, oil, or other contamination unless the converter has validated bonding to that exact surface. Ask the supplier to show where the glue path sits relative to the aperture. A neat front view can hide skips, squeeze-out, or a patch that barely covers a corner.
4. Keep the opening away from functional stress
A window should not weaken a lock, hinge, tuck, glue flap, or load-bearing bridge. This is especially important for a child-resistant pre-roll box with an optional window: the viewing feature must be designed around the opening mechanism and must not be treated as evidence of child-resistant compliance. Functional performance and any required compliance assessment remain separate approval tasks.
Use radiused corners where appropriate and leave enough paperboard between the aperture and nearby scores. Do not guess a universal minimum distance. The safe geometry depends on the board, grain direction, opening size, folding sequence, and filled-pack loads, so it should be established in the dieline review and production trial.
5. Coordinate the window with the insert and product
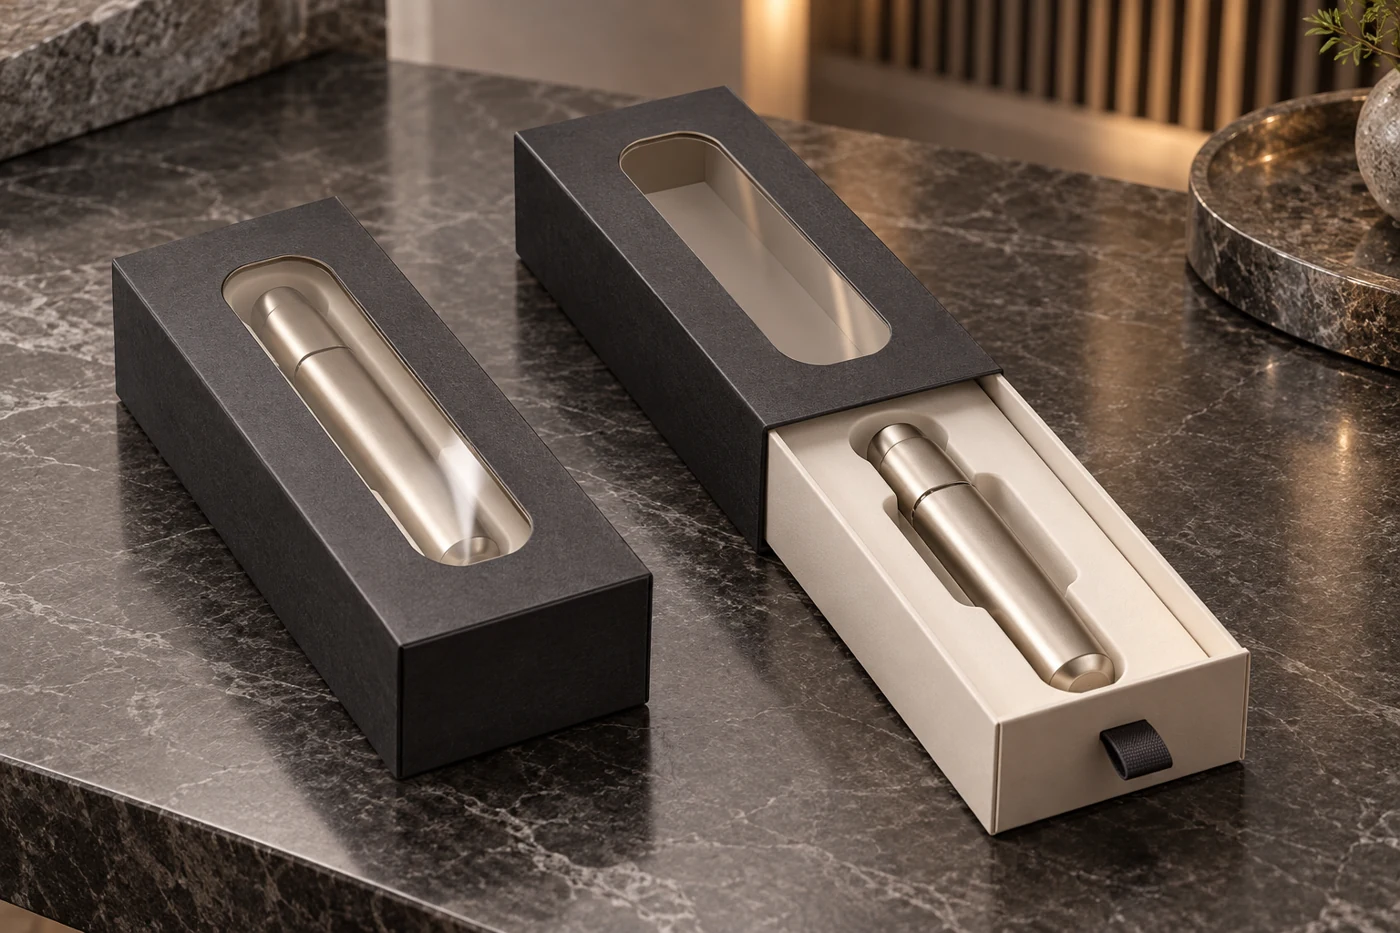
The insert controls where the product sits; the window controls what the shopper sees. If those two parts are approved separately, normal insertion tolerance can reveal an edge of foam, hide a key feature, or press the product against the film.
This is easy to visualize in a slide-drawer cartridge box with a display window and insert tray. The supplier needs the actual cartridge dimensions, the retention method, and the intended viewing area. Likewise, the 1 ml cartridge drawer box with a foam-lined insert and window should be reviewed both closed and during opening, because the moving drawer changes what sits behind the aperture.
6. Control handling after patching
High-speed window patching is a controlled converting operation. Heiber + Schröder lists production features intended to manage film with critical static load, curved blanks, glue application, registered film, and pre-creased or shaped patches. Those capabilities show why static, blank flatness, registration, and application control belong in a production discussion. They do not prove that a specific machine is used for your order.
After patching, the blanks still pass through folding, packing, storage, and transport. Specify when protective film, if used, should be removed. Require clean interleaving or packing when rub risk is high, and make sure inserts or products do not press sharp features into the transparent panel. A retail vape cartridge carton with a transparent PET window should be evaluated after realistic filling and shelf handling, not only while lying flat on a sample table.
Use a three-stage approval sequence
Stage 1: structural proof
Approve the aperture shape, patch outline, glue land, scores, and insert position on a dieline. Then inspect a cut and assembled unprinted sample. This stage answers whether the structure can be made and used; it does not prove final clarity or adhesion to a printed, laminated surface.
Stage 2: production-intent appearance sample
Use the intended board, print coverage, coating or lamination, window film, and adhesive route. Review the sample under agreed lighting against a physical reference. Check both sides of the window, all perimeter edges, glue cleanliness, registration, and the view with the product loaded.
Stage 3: packed and conditioned verification
Build multiple cartons from the production-intent process, fill them using the expected packing method, and expose them to the handling and distribution checks appropriate to the project. Record the sample quantity, conditioning period, acceptance method, and who approves deviations. If the pack will be stored in changing temperature or humidity, include those conditions in the validation plan instead of assuming an empty room-temperature sample covers them.
| Decision | Do not approve from | Approve from |
|---|---|---|
| Window position | Artwork PDF alone | Assembled carton with the product and insert |
| Clarity | Polymer name alone | Named film sample under agreed lighting |
| Bond | Hand-glued white dummy | Printed and finished board using the intended application process |
| Scratch resistance | Fresh sample straight from the converter | Packed samples after representative handling |
| Mass-production release | One “golden” sample | Defined checks across the production lot |
Choose the most economical fix that addresses the cause
If clarity is poor, changing adhesive will not correct an inherently hazy or damaged film. If an edge lifts, selecting a more expensive optical film will not repair a contaminated or undersized bond land. If the patch waves because the opening is too large for the construction, increasing glue may create squeeze-out without controlling the unsupported span.
Cost decisions should therefore follow the diagnosis. A smaller window can reduce film use and improve panel integrity, but it may show less product. A surface-treated film may improve process compatibility, but it must be oriented and controlled correctly. Protective liners can reduce handling damage, but they add removal steps and waste. A paper-based alternative may support a different material strategy, but it changes visibility. Ask the converter to price clearly separated options rather than bundling every change into one unexplained premium.

What should a buyer include in the RFQ?
- Final product dimensions, weight, shape, and approved orientation.
- Required visible area and anything that must remain concealed.
- Carton structure, board, print coverage, coating, lamination, and insert.
- Preferred film or performance brief, including clarity and surface expectations.
- Relevant product-contact, market, labeling, or functional requirements.
- Expected packing method, storage conditions, distribution route, and retail handling.
- Sample stages, quantity for evaluation, acceptance criteria, and defect photographs.
- Whether the supplier may propose a smaller opening, different corner geometry, or alternative material.
When comparing quotations, make sure each supplier is pricing the same window film, patching operation, protection method, and approval scope. The lowest unit price can be misleading if one quotation excludes production-intent samples or protective handling that another includes.
Frequently asked questions
Is PET always the clearest choice for a carton window?
No polymer name guarantees the finished appearance. PET is available in many grades, and optical clarity, surface treatment, thickness, handling, and the finished pack all matter. Approve the named film used on the intended carton.
Can the window be added after the carton artwork is approved?
It should be integrated before structural approval. The opening affects panel strength, artwork clearance, glue land, insert position, and what the product reveals. Adding it late can force compromises in all five areas.
Why does the sample look clear but the production cartons look scratched?
A hand-carried sample may avoid blank stacking, packing-line contact, bulk packing, and transport vibration. Review samples from the intended production and packing process, then inspect them after representative handling.
Should the window touch the product?
Normally the designer should control product clearance with the insert and carton geometry. Direct pressure or rubbing can distort or mark the film. The acceptable clearance must be checked with the actual product and packing tolerance.
Can a windowed carton still use child-resistant features?
Potentially, but the window must not interfere with the mechanism, and a visual or structural sample does not establish regulatory compliance. Define the target market and required test or documentation separately.
Approve the complete pack, not an isolated transparent patch
A reliable carton window is the result of coordinated structural design, film selection, surface preparation, adhesive application, insert control, and realistic approval. Give the supplier the product, viewing objective, finish stack, handling route, and acceptance method early. Then use the same approved construction for production.
If you are planning a windowed folding carton or drawer box, send PaperBoxPro your product dimensions, dieline or reference pack, target quantity, market, and the window defect you want to prevent. Request a structural review and production-intent sample plan before approving mass production.